While in the past, theodolites and template comparisons were used for determining accuracy in large fabrication projects, the ability to scan and probe with a Laser Tracker has become the standard in many industries (like Shipbuilding and Aerospace). These methods of data collection are much faster and more accurate than traditional methods, collecting points that are accurate to within a handful of microns and instantly transferring those values over to metrology software, where they can be analyzed and used to compare to existing CAD models or create new ones.
Far from being different, the use of Laser Trackers might be even more essential to the moldmaking industry. There is a higher level of uncertainty in the molding process for everything from small plastic-injection molds to large-scale rotor blades for windmills. Any faults in the mold are doubled during casting and again during manufacturing for materials that are wet during construction. Therefore, the potential shrinkage must be accounted for in the mold design as the part dries.
From verifying and leveling the molds to part verification and alignment to managing “Smart” inspection systems, Laser Trackers (and the probing and scanning capabilities they offer) are now embedded in almost every stage of the moldmaking production process. Below are some of the most important uses of a multi-functional scanning and probing device in this field.
Model Generation
For new molds being created, 3D laser scanning can be essential in creating a new CAD file or updating an old design to allow for production of a new line. The scanner’s dense collection of “as-found” data points can be reverse engineered into a CAD model of the mold, with tactile probing measurements confirming individual features of the tightest tolerances. This new model can be saved to compare future molds off the line or for updates on future design changes.
Mold Inspection
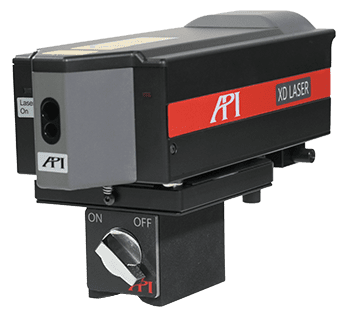
The greatest way to ensure accuracy in the finished mold piece is to ensure the accuracy of the mold it is casted from. In the past, contact measurement tools like vernier measuring tools, micrometers, or even CMMs would take methodical point measurements of molds after they had been machined. But by using a Laser Tracker and an accessory capable of 3D laser scanning and/or probe measurements, these inspections can be completed in a fraction of the time while still meeting the extremely tight tolerances needed in moldmaking for industries like Aerospace, Wind Power, or Automotive manufacturing. Scanners and probes can even be mounted to a robot’s end-effector for automated inspections directly from the production line.
Mold Leveling
Once the design of the mold has been compared to the CAD model, the level of the mold, and the spandrel braces holding its position, can be verified by Laser Tracker measurements repeatedly before and during casting. As designs have become increasingly larger and more complex, the complete measuring range of the Laser Tracker has become more essential. The Tracker is also used to compare the casted part to the mold itself, allowing for mold adjustments to be made between castings. This comparison also makes it easier to manage the “Spring In” effect of oval molds needing to produce round parts. Probing capabilities are extremely useful for all of these measurements to reach hidden points outside the tracker’s line-of-sight to reduce the number of tracker setups needed to complete the measurement.
First Article Inspection
After verifying mold construction and installation, Laser Trackers, and their scanning and probing accessories, are essential for verifying the casted parts to their CAD model. Laser line scanners can rapidly generate a dense point could of information on the casted part’s features, while the probe attachment can confirm the absolute position of key features of the part. All of this information can be instantly compared to the CAD model to ensure the mold is producing accurate parts. Any variations out of tolerance can be machined into spec, with necessary adjustments for the mold construction and level identified.
In short, 3D laser scanning and tactile probing (often with the use of a Laser Tracker) can verify the as-built dimensions of a mold, create a CAD model of the mold for comparison and mass production, level the mold for casting, and perform complete inspection of the first casted parts that come from the mold. This equipment has revolutionized the way many industries manage their quality assurance processes over the last several decades, allowing for more accurate productions of parts that are increasingly larger and more intricate in a fraction of the time, saving manhours and production times.


