API’s Machine Tool Calibration Processes Reduce Installation and Launch Errors
A majority of machine tools are out of specification and exhibit errors in their processes from the time of installation. API’s Machine Tool Calibration (MTC) line offers a variety of ways to reduce these errors. These products and procedures result in dramatic improvements in the machining process.

- VCS (3 axis verification) 3-5 Times Volumetric Improvement
- VEC (5 axis verification) 4-5 Times Volumetric Improvement
A Hewlett-Packard Company study in The International Journal of Advanced Manufacturing Technology revealed that 88% of 57 machines were out of specification upon installation. That is 50 out of 57 machines. There are many reasons why machines can fall out of specification, even at installation, ranging from uneven foundation, mounting and alignment, and temperature conditions on the shop floor.
Each axis of a machine tool has six possible errors (X, Y, and Z straightness and positioning errors as well as pitch, roll, and yaw), and the machine tool itself has potential for three additional squareness errors. Correctness of a Machine is one of the most important prerequisites to ensure product quality. Each error leads to lost revenue in wasted materials and downtime as machines are corrected, and these errors often get worse over time.
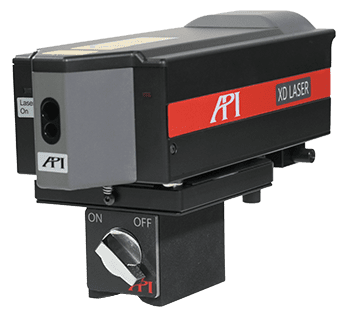
Fortunately, these errors can often be corrected with a simple calibration. And the API XD Laser is the only metrology laser capable of measuring all 6 degrees of freedom in one measurement reducing the measuring time as much as 5:1.
The XD Laser leads API’s state-of-the-art MTC product line, which also includes the Wireless Ballbar, Swivel Check, and Spindle Check. And API partnered with Siemens, Fanuc, OSAI and Fagor to create new, improved Standard and Volumetric compensation processes.
The Standard compensation processes can correct for linear errors both unidirectionally and bidirectionally and the alignment of ways. The Volumetric processes include a 3 Axis compensation, which can correct for twenty-one errors; a 5 Axis compensation, which corrects for twenty-one errors and tool vector; and VEC which utilizes API’s Radian Laser Tracker series and the Active Target to correct for all forty-three possible errors from a 5-axis machine tool.
As mentioned above, the XD Laser is the only metrology laser capable of measuring 6DoF in a single setup, and its standard compensation can result in eight- to tenfold linear improvements in a single day of scanning. Even the VEC 5 Axis Verification can be performed in a single day and shows four- to fivefold volumetric improvement.
Additionally, API’s MTC Products and Services are fully accredited. API is ANSI/ASME B5.54, ISO 230-2, and ISO 230-6 Certified in North America, and has attained VDI 2617, the European equivalent of ISO 230 Standard.
All machine tools, even ones that have just been installed, need to be calibrated and compensated for potential errors. API has
Contact Us
If you have questions about any of our MTC products or services you can contact us here


