The Combination of the XD Laser and SCI’s Proprietary Software Allows for Up to 66% Reduction in Calibration Time
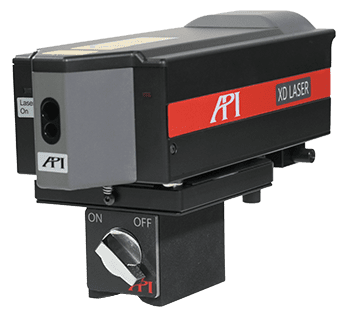
After seeing the API XD Laser in action in 2007, Ron Jakl immediately recognized the possibilities for CMM calibration. He started his own company, Select Calibration Incorporated (SCI), to begin researching the process and creating software to expedite it. Ron’s work and API’s equipment have combined to create a CMM calibration process that can be done in a single laser measurement setup. The results have been conclusive:
- 50-75% Time Reduction
- Increased Accuracy Through Higher Data Count
- Simpler Laser Setups, Making Training Easier, Reducing Mistakes
Founded in 2007, Select Calibration Incorporated is an ISO/IEC 17025 accredited world-class calibration service provider for coordinate measuring machines. They use innovative technologies to fully remap CMMs in a fraction of the time traditionally required. Their suite of software allows them to calibrate CMM’s from a variety of vendors and generate a wide range of detailed calibration reports based on customer requirements.

SCI uses the ISO/IEC 10360-2 or ASME B89.4.10360-2 standard for Acceptance and Reverification of Coordinate Measuring Machines when testing the performance of a CMM. Reference standards used for calibration are traceable to the international system of units (SI) through an unbroken chain of comparisons. They are ISO/IEC 17025 accredited with an accreditation scope suitable for the required CMM performance tests.
Before Ron Jakl saw the XD Laser and realized its applications, calibrating CMMs was a complicated and time-consuming process. A typical CMM has eighteen axis parameters and three squareness parameters described in a compensation error map table. An experienced technician would still need around sixteen hours to measure and update all eighteen axis parameters for a typical bridge machine. Each parameter required a separate setup and measurement with a typical laser or other hardware (levels or straight edge). When including the squareness and a suitable performance test, a complete calibration would take around 24 hours, or three business days, in total.

For new machines, collecting all the axis parameter data was unavoidable. When re-calibrating an existing machine, in an effort to keep the calibration time down to one day, some compensation parameters were assumed to be correct and not checked. The assumption is that most of the parameters are stable and do not change. Yet, if the CMM failed its final performance test, the process had to be started from the beginning again, and unchecked compensation parameters might then have to be factored in.
When using the API XD Laser for CMM calibration however, a single setup and measurement cycle is all that is needed to collect the scale, horizontal straightness, vertical straightness, roll, pitch, and yaw for the X and Y axis. Two symmetrical measurements are required for the vertical axis as roll must be extracted from changes in straightness. Any machine can be fully calibrated in four sets of measurements, down from the previous number of eighteen. This reduced number of setups is aided further by faster processing times.
The previous estimate of sixteen hours for a skilled technician to measure and updates all axes is reduced to three or four hours by using the XD Laser. This estimate doesn’t include the time necessary for performance testing. For a typical bridge CMM, the calibration, including performance testing and updating all compensation parameters, takes ~8 hours, where using traditional methods would have taken 24.
There are numerous advantages to the reduction in time and simplified process. With the single setup and faster data collection and processing times, it is easier to run multiple measurement cycles on the same machine to ensure accuracy and consistency. And the simplified single setup allows for easier training of the process while reducing the opportunity for costly errors. It also eliminates the need for pre-measurement diagnostic runs to identify parameters in error, since none of them will be skipped to save time and effort.
And SCI’s proprietary software processes the data from all measurement parameters into a single error map, creating more detailed results that allow for more errors to be identified. “Right now, my competition is light-years behind me, and they know it,” Ron Jakl says. “One good example is a machine I found that had the end of the drive motor pinion touching the side of a rail. When collecting data, the horizontal straightness data didn’t agree at all with the associated angular data. It was an easy fix, but it might have gone un-noticed if I didn’t have the six-parameter laser monitoring all characteristics of the machine simultaneously.”
The combination of the XD Laser and SCI’s software can monitor the changes in a CMM over time, which is useful for larger machines where the foundation is still settling and can even detect changes as small as a misaligned drive belt. They’ve even managed to make sign reversal errors, a common issue with other laser measurement devices like the Renishaw M10, obsolete because the straightness and angular parameters are related, and when scanning from a single setup, it is impossible for one to reverse independently.
If you’re looking to calibrate you CMMs, API’s XD Laser combined with Select Calibration Incorporated’s software can save you time and money while increasing your accuracy.
INTERESTED IN OUR METROLOGY PRODUCTS OR SERVICES? CONTACT US HERE.


