3 Reasons to Calibrate Your CMM Today
In the last 50 years, Coordinate Measuring Machines (CMM)s have become a fixture in machine tool shops and manufacturing plants around the world. Even with the advent of Laser Trackers and multi-axis Scanning Arms, CMMs have maintained their place in the quality control process as a final check and confirmation of the inspection results. CMMs are robust, comprise few moving parts, and their movements are mostly analog and user manipulated. For these reasons, CMM maintenance and calibration can often go overlooked, especially if CMM’s performance is not noticeably slipping.
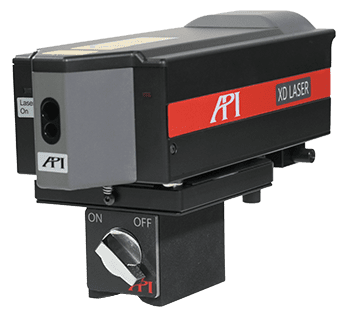
CMM calibrations, however, need to be performed at least once a year; ISO certification mandates this. And that is just for standard use. The more a machine is used on multiple shifts by multiple operators, the higher frequency of calibration is recommended. CMM calibration is a task that is carried out upon installation and then as necessary to determine the magnitude of all the twenty-one kinematic error sources. This is also often referred to as error mapping a CMM. Traditionally, full CMM calibration was handled by the Original Equipment Manufacturer (OEM), but some third-party Metrology Service Providers (MSP)s, like API Services, now offer complete calibration of CMMs using a laser interferometer and proprietary software. Calibrations are a fully restorative process for CMMs, embedding error compensation tables directly into the machine’s software to restore optimal functionality.
It is important to note the difference here between calibration and verification. Verification is a task that is carried out at periodic intervals (often annually) to determine if the CMM still meets the manufacturer’s specification. Verification can be performed more quickly on-site by an MSP or the in-house quality department, but it does not diagnose where CMM error is taking place nor correct the error as full Calibration does. In addition to maintaining ISO-mandated compliance, there are several reasons to calibrate your CMM today:
1) VALIDATION

Even if a CMM is running as expected, calibration and verification should be done at regular intervals to ensure that machine accuracy remains to specification. These processes are largely preventative. Their goal is to catch and correct errors before they become significant enough to affect CMM performance. CMM measurements verify every other process in the plant, from CAD modeling to machining to spot checks throughout the process. Regular CMM maintenance can help to not only prevent cascading failures that can be costly in terms of wasted material and downtime, but to catch them as they are developing.
2) Crash Recovery

Every time the CMM experiences a crash it can affect the squareness of the axes. At minimum, the machine should have its axes verified after every crash. This can be from a fast-check tool for z-axis squareness like a Ballbar or a Machine Checking Gauge. In order to be safe, the CMM should be given a full, laser interferometer calibration from either the OEM or an outside MSP to verify the squareness and compensate for any errors that are found on the spot.
3) Repeatability

In order to be completely Accurate, CMM measurements need to be not only True to the value they’re measuring, but they need to be Precise in repeatedly finding the same point in multiple measurements of the same part and others of the same run as they come off the machine. Repeatability errors in CMM measurement can be misattributed to errors elsewhere in the manufacturing process if they are not identified through routine maintenance and calibration. Chronic repeatability errors from the CMM, like air bearing drag or worn drive, may need physical repair from the OEM if they are not corrected by calibration.
CMM performance must be tested regularly (either through Verification or Calibration) to ensure the CMM’s position as the final check of every other manufacturing process in the plant. In addition to being required for ISO certification, these inspections can help diagnose errors before they exceed tolerance and lead to costly scrap products and downtime. If you are looking for CMM Verification or Calibration, please contact API Services’ experienced team of Metrologists below.


