Operations managers and quality directors know the challenge: capital equipment like laser trackers or automated measurement systems aren’t cheap, and you’re often asked to justify laser tracker cost before getting approval. The only way to do that is by demonstrating a strong return on investment – showing that better metrology will save more time, scrap, and money than it costs, thus improving metrology ROI.
Poor quality is costly. The American Society for Quality (ASQ) reports that quality issues consume 15–20% of revenue. This post outlines how automated metrology can reduce those hidden costs and deliver a fast return on investment—often within a year, which boosts your metrology ROI.
The Hidden Costs of Outdated QA
Outdated QA methods often miss errors until it’s too late, resulting in scrap, rework, and delayed deliveries. Such inefficiencies impact metrology ROI.
- Scrap and Rework: If a part is out of spec, material and labor costs are lost. That’s pure waste.
- Warranty Claims & Returns: Defects that reach customers can trigger returns, replacements, and lost future business.
- Missed Deliveries and Lost Business: Poor quality can delay shipments and result in lost orders or damaged customer trust.
These failures add up. Sticking with slow, manual processes means you’re likely paying for quality failures in the form of scrap, rework, and missed opportunities. Upgrading your metrology process helps prevent issues before they become expensive problems, thereby improving your metrology ROI.
How To Get Your ROI
ROI (%) = ((Annual Savings – Investment Cost) ÷ Investment Cost) × 100, a calculation essential for understanding metrology ROI.
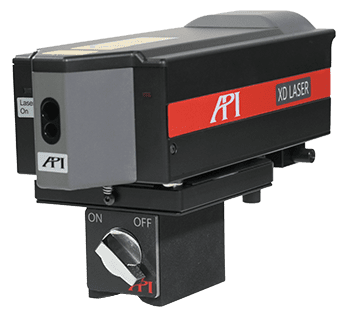
Metrology ROI Case: API iLTx Laser Tracker in Action
A precision-machining aerospace plant swapped its stationary portable CMM arm for an API iLTx laser tracker. With the arm, parts had to be shuttled from the machine to a temperature-controlled lab and positioned several times; each titanium housing took ≈ 45 minutes to verify.
The iLTx, by contrast, is fully portable and sets up right beside the CNC cell, capturing the entire volume from a single station. That change alone slashed inspection to ≈ 7 minutes per part.
Why the savings were so dramatic
| Factor | Portable Arm (old) | iLTx Laser Tracker (new) | Impact |
|---|---|---|---|
| Setup location | Lab-only, requires part transport | Shop-floor, no transport | Eliminated queue and travel delays |
| Number of setups per part | 3–4 repositionings | Single setup | Cut probing time to one-sixth |
Where ROI Is Found in Metrology Upgrades
API’s 9D LADAR automated inspection cell scanning a car frame, illustrating improved speed, quality, and metrology ROI
Automated metrology systems, whether a robot-mounted laser scanner like API’s 9D LADAR or a portable CMM arm like the API ProGAGE series, directly target the inefficiencies of manual inspection. By bringing fast, precise measurement to the shop floor, these technologies help manufacturers reduce inspection time, catch defects earlier, and increase throughput – all key factors that drive metrology ROI on the shop floor.
Final Thoughts on Metrology ROI
Upgrading your metrology system can dramatically reduce the cost of poor quality. With lower scrap, faster throughput, and better documentation, automated inspection becomes a profit driver, enhancing metrology ROI.
Want to know what your ROI would look like? Contact us today to get a personalized ROI analysis for your process and parts.
👉 Contact API to start your analysis.


