Since the first machine tools were made more than 200 years ago to make manufacturing faster, more accurate, and more standardized, machine tools have needed calibration to verify their performance is as desired. These calibrations have evolved over the centuries from hand measurements and manual adjustments of tables to the standard laser interferometer calibration used in machine shops all over the world today.
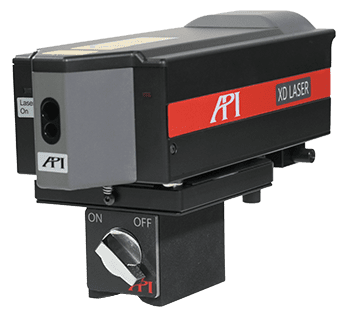
The now-traditional laser-based machine tool calibration typically measures each axis of the tool individually, using a straight-line laser interferometer, like API’s XD Laser. This allows for linear errors in the x, y, and z axes of a machine, plus their squareness to each other to be verified in a matter of hours. Metrology software analyzes the measurement data and creates a correction table that can be uploaded directly into the machine tool’s controller for automatic compensation on future machine runs.
But as manufacturers continue to push the limits of these tools to produce larger, more complex assemblies, there is often a need for a greater level of accuracy than the traditional methods can provide. A volumetric analysis of the machine that looks at how the axis work in conjunction with each other, and how the tool tip moves through three-dimensional space in real-time is necessary. And in order to provide a Volumetric Error Compensation (VEC) of the machine’s entire working volume, you need the combination of interferometer accuracy and 6DoF measuring capability that can only be found in a Laser Tracker.
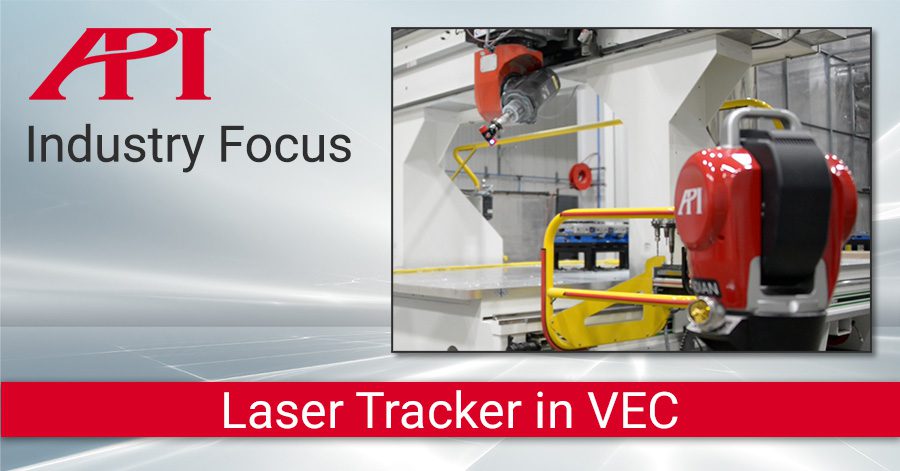
Laser Trackers in VEC
API’s approach to the volumetric calibration of large 5 axis machine tools comprises a 6 DoF Radian Laser Tracker with interferometry capability and its Active Target motorized SMR. The interferometer feature of the API Radian Pro Laser Tracker is identical technology traditional laser interferometry systems have used for decades to successfully calibrate machine tools. Coupling the interferometry technology with a Laser Tracker’s ability to track a moving point in space offers the added capability to track the machine’s tool-tip location through extensive axial movements throughout the entire volume of large machines. API’s motorized Active Target locks onto Radian’s beam and automatically positions itself so as to never connection with the tracker.
Using Radian and Active Target, the VEC technique measures all 43 possible error parameters for as many as 400 points within the machine’s working volume with all possible machine poses, even with the rotary head. Each point becomes an accurate reflection of the machine’s kinematic errors. A complex algorithm is used to decouple error sources and build an extremely accurate volumetric machine error map. Error compensation is completed by adding the compensation from the entire measured axis to achieve optimum tool-tip position.
The API calibration solution also includes proprietary calibration software that uses a polynomial equation-based, kinematic model of the machine to map errors throughout the volume. To compensate the machine in real-time, the software resides on the machine’s controller or on a separate PC that directly interfaces with the machine tool controller.
In summary, the software uses the measurements from the API Radian Pro Laser Tracker and Active Target to develop compensation values to drastically reduce machine errors. Once the machine is put back in production, the software runs in the background, monitors the programmed tool path, and applies real-time compensations automatically to the tool tip.
The Globally Local team of Real Metrologists at API Services helped pioneer VEC technology for large-scale machine tool manufacturing, and they are experts with the technique and API’s state-of-the-art laser-based dimensional metrology equipment. With more than 400 years combined experience in metrology applications across all industries, they have the know-how to handle everything from Prototype Inspection to Calibration of Laser Trackers, Machine Tools, CMMs, and Industrial Robots to large area scanning and process verification. Fill out the form below to contract their expertise.
SMR. The interferometer feature of the API laser tracker is the identical technology traditional laser interferometry systems have used for decades to successfully calibrate machine tools. Coupling the interferometry technology with a laser tracker offers the added capability to track the machine’s tool-tip location through extensive axial movements and throughout the entire volume of large machines. The motorized Active Target locks onto the API laser tracker and automatically positions itself so as to never lose the tracker laser beam.
Using the laser tracker and API’s Active Target, the Volumetric Error Compensation (VEC) technique used measures all 21 error parameters for as many as 400 points within the machine’s working volume with all possible machine poses, even with the rotary head. Each point becomes an accurate reflection of the machine’s kinematic errors. A complex algorithm is used to decouple error sources and build an extremely accurate volumetric machine error map. Error compensation is completed by adding the compensation from the entire measured axis to achieve optimum tool-tip position.
The API calibration solution also includes proprietary calibration software that uses a polynomial equation-based, kinematic model of the machine to map errors throughout the volume. To compensate the machine in real time, the software resides on the machine’s controller or on a separate PC that directly interfaces with the machine tool controller.
In summary, the software uses the measurements from the API Radian Laser Tracker and Active Target to develop compensation values to drastically reduce machine errors. Once the machine is put back in production, the software runs in the background, monitors the programmed tool path, and applies for real-time compensations automatically to the tool tip.
To request a quote or demo of the Radian with Active Target, click here.
To have API’s world-class Services team calibrate your 5-axis machine tool, click here.


